Monday, 23 May 2011

3rd year Final BA (Hons) Game Art

And so the final project is complete for college, its been a hard couple of months of solid slog,
many night right through till morning but I hope it all pays off

Final renders of my hotel level in UDK


and heres some of my assets produced in 3ds Max


four poster bed with Alpha for net curtains

one of my favourite models so far, a bit pricey on polys , but it looks the part and look sweet in UDK with emissives for the lights.unfortunatley my hard dirve didnt save this max file so ill have to re model this one day.

luggage trolley and cases
Piano was added in the centre of the ground floor as a focal point , originally this was going to be a bronze statue but time was not on my side , so a simpler asset had to be made for now, once i get Mudbox to be more steadier ill have a go at a bronze statue like on my original design:
this was taken from the Tower of Terror ride in Florida and was my original inspiration for the level.

Other assets:

Reception


these where also taken from the Tower of Terror


and a few more for the kitchen and dining room

my work exhibited in the end of year Degree show at St.Helens college


so big big thanks goes out to all that have helped me on this course,special mention to Adam who was like a rock when i needed it he was there for me , especially Stas who gave me the confidence to complete this course and gave me the chance to show my CREATIVE side , without him accepting me on the initial Fda Course way back in 2008 I probably still be scaffolding with a bad back for the rest of my life and no real prospects.

Also a massive thank you to my family especially my wife Alison for putting up with all the late nights and all the moods that go with working straight through the night and for encouraging me in the first place.

So this ends another chapter in my life hopefully new chapters will be on the horizon.

Saturday, 22 January 2011

Mudbox Project Dunnnnnnnnnnnn!

So I finally completed my first ever project using the brilliant Mudbox.... great program when it doesnt crash so here are a few of my final renders


and a few renders of my Mudbox models.........


ok thats about it for this project , Im off to Thailand for a break and some serious drinking of vast amounts of beer ...... when I get back next week its back to the Hotel project Cul ppl

Saturday, 15 January 2011

now its monster time!

So ive decided to do a warm colour for the monster just to try and put some colour to the whole scene as most of the scene is dark and dank so I went for a fetching red and pink number

and here it is in Mudbox , just put a few scales and small details on it ..... and here's my scene so far

Monday, 10 January 2011

Big chest from a box

So ive started on the tresure chest thats in the concept, having a few problems with this one though as when i export my textures back into 3ds Max all the textures come out wrong, had a word with the wise men at college Dean/Stas see if they can come up with some ideas wats going wrong :( anyways here is the chest in all its glory even if it looks rubbish in Max it looks cool in Mudbox

and this is the resulting export to photoshop through Mudbox
its just not capturing all the textures for some reason

Tuesday, 4 January 2011

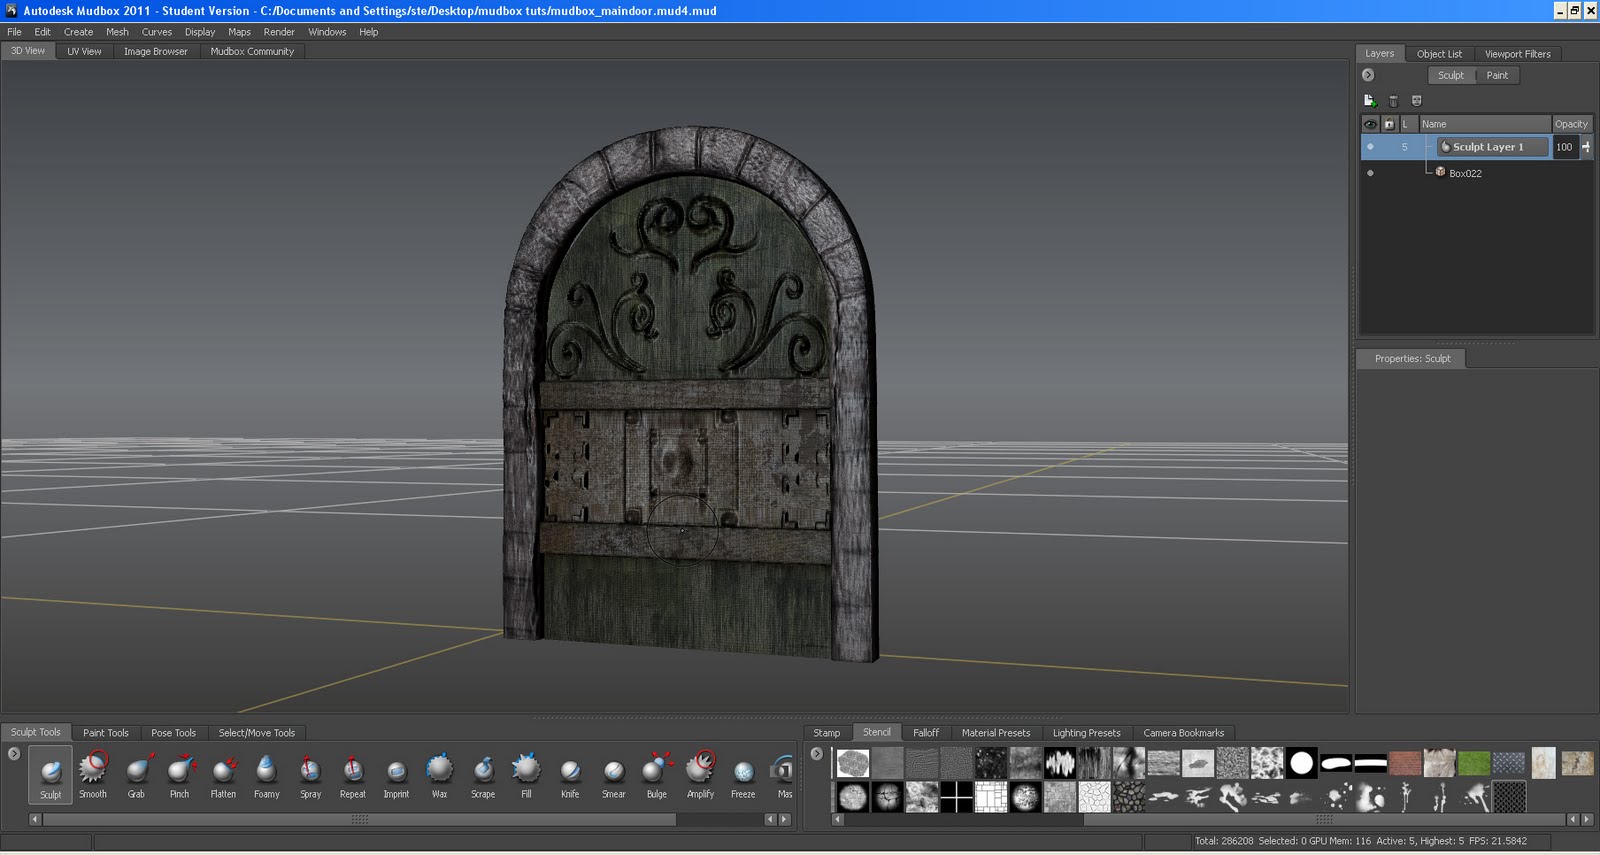
medieval door

I was thinking what i wanted the main door to look like , and decided I wanted a bit LOTR look so i came up with this which works well .......


and ive also been working on the steps a bit more ...........


Saturday, 18 December 2010

Mudbox time again

Ok ive been using mudbox a few weeks in college , with some sucess , but to get really good results I have to really push up the resolution in mudbox, and the normals isnt as good as using nvidia in Photoshop but hey ho heres my floor so far, I was trying to break it up a bit
So im liking how the floor look now, I think im going to redo the well in mudbox see if I can really make it look like slime dripping off the sides .

Then im going to start on the walls

Wednesday, 17 November 2010

its Mudbox time !


Here's the concept that Dean has kindly provided to us

So here's my block out in Max so far, ive put a mesh smooth on most of the assets, just to see if the control points are going to work , so I can then export into Mudbox..... just a bit gutted im going to miss out on Deans tutorials on how to get the normals and stuff while im in Thailand


so I hope these are looking the part , not really happy with the chest yet and ive got to do the monster and other bits , but most of the assets are working in mudbox, just gotta start un wrapping when i get back.

Sunday, 17 October 2010

Lets Have Some Atmosphere !!!

n so here ive combined two textures the first is the main door texture which is the main texture on the mesh, and the 2nd is the blood texture which i made in photoshop and combined the two using a multiple node in UDK and then simply used the Panner node to move the blood texture down the door, i also combined the normal texture for both and used a panner on the blood to try and make the blood look proud of the door.

ok now ive got my blood texture the next step was to see if i could animate a emissive light shining through a window.I have used a alpha texture to give me an opacity on the window glass and then i used a Rotator node in UDK combined with a simple cloud texture that i found in UDK
and heres a breakdown in UDK of how i built this ,note the Rotator node has its own values of X and Y and initial speed , which you can play about with to get varying results


Ok im finally getting somewhere with the effects I was wanting to get for my haunted theme the next step was to animate a materail and get a light to flash in sequence so that when the player enters the corridor it triggers both the light and the materail and also try and add sound to the mix which after a LOT of hair pulling I eventually got :


so how did i get this, here's a breakdown which is quite complicated so here goes:


The first thing you notice in the engine is two different icons:

1. Mi- short for Material Instance Actor,the first thing i did was assign this to my map through the main actor browser,once assigned I then copied the original material as a Material Instance and copied it to the mesh


this is the main texture that is on my mesh , i had to make sure I added a Vector Parameter and give it a value and then name it before copying it as a Material Instance this is what will be animated in the Matinee
a breakdowwn of the sequence used in Kismet to animate the material and the lights, the first thing to do is assign a VectorMaterialParameter


this control;s the brightness of the material by inputting a value of
0= off
1= full brightness

and any altenate values between 0 and 1 will give varing amounts of emissive brightness on the materail.

Then its just a matter of moving the time line everytime a new value is entered.

The next part is to animate the light themselves , this is acheived by firstly adding a Pointlighttogglable to my map


once this is assigned it into Matinee:
the brightness is controlled with a group called
NewFloat Property Track and a value given for the brightness from 0 -1 just like I did for the materials earlier , and again using alternate values I can control the brightness of the light: